
Capture leads with a web form
Build a form, share its link or paste it into your website, and every answer becomes a contact with a task.
- Who can do it
- Owner or Admin
- Plan
- All plans, no limit on forms
- Time
- 10 minutes
A web form is the simplest way to get leads in without anyone typing them. A visitor fills it in, and EnableLeads creates the contact, gives it a source and a first task, and tells the person who gets the lead.
Build the form
- Open Settings → Apps and Integrations → Web Forms and choose Add form.
- Give it a Form name. This is also the lead source name on every contact it creates, so use something you will recognise in reports, like "Website contact form".
- Optionally add a Headline (the big heading visitors see) and a short Description. When you set a headline, the form name moves beside your logo.
- Under Fields, add what you want to ask for, tick Required where an answer is a must, and reorder with the arrows. At least one of name, company or email is needed, so every lead has someone to follow up.
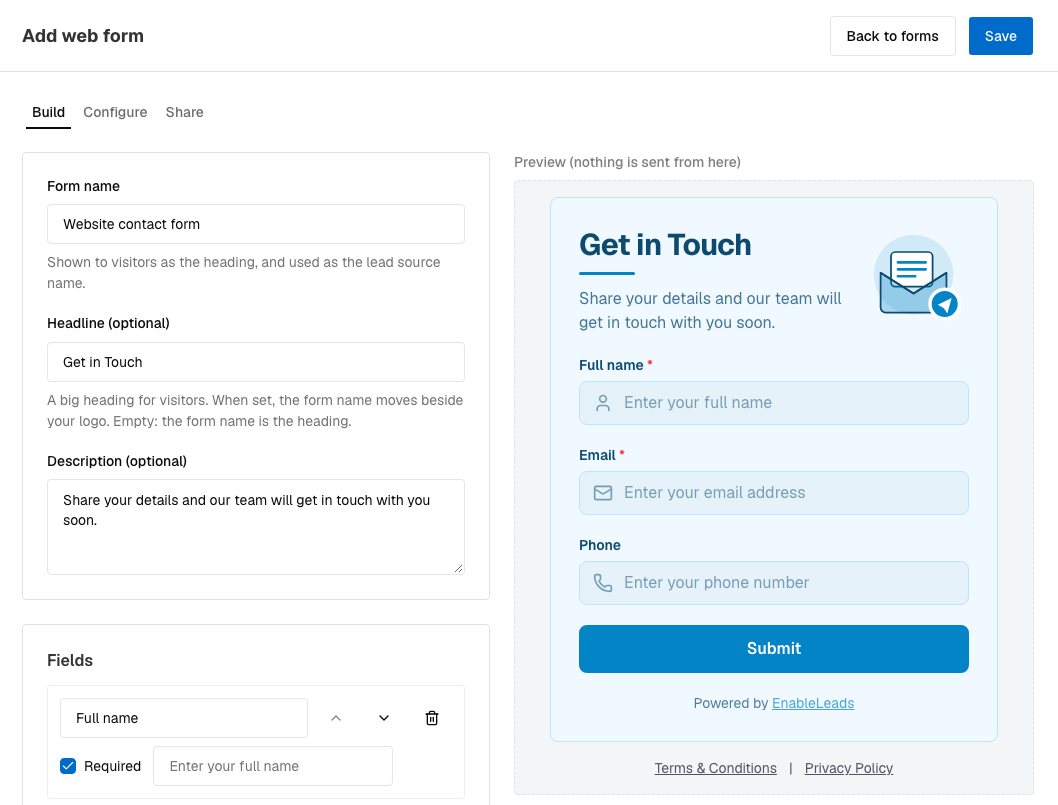
The form builder, with a live preview beside the Look settings. - Write Consent text if you want visitors to tick a box before they send. The consent is saved on the contact.
- Choose Save. The form is saved at every step, so leaving the page never loses your work.
Make it look like you
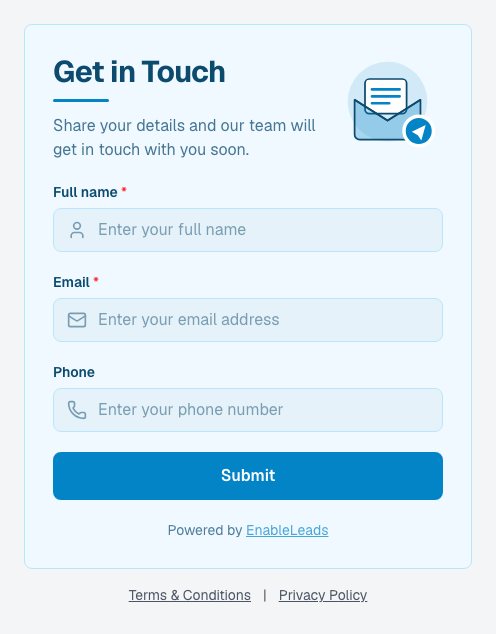
The Look card on the same tab controls the design, with a live preview beside it.
- Logo: upload a PNG, JPG or WEBP once the form is saved. It appears above the form.
- Theme: pick a ready-made set of colours, then adjust any of them.
- Corners and width: square, soft or round; narrow, normal or wide.
- Picture in the header: an envelope, a chat bubble or a phone, drawn in your colours.
- Footer: a line of text and links to your Terms & Conditions and Privacy policy, shown under the form.
Decide what happens to the lead
Open the Configure tab.
- Choose After the form is sent: show a thank-you message, or send the visitor to a page of your own.
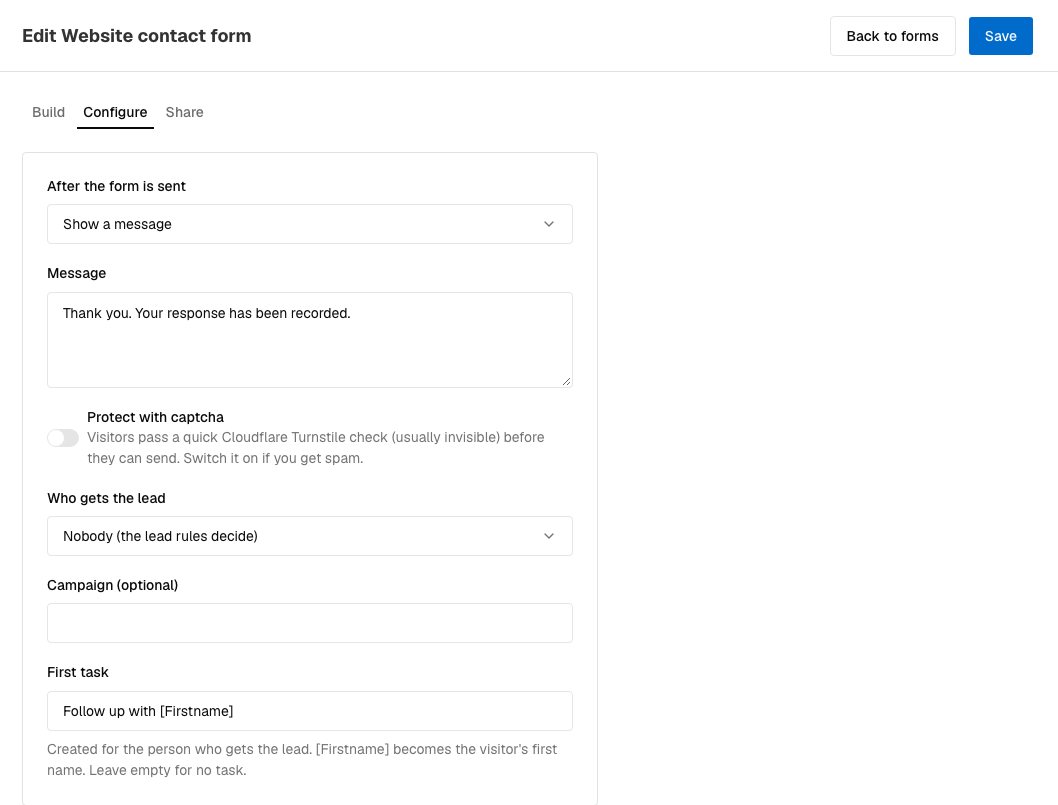
The Configure tab. - Choose Who gets the lead: nobody in particular (your lead routing rules decide), the people you pick by turns, or everyone active by turns.
- Add a Campaign and Tags if you want contacts labelled, and write the First task. In the task text,
[Firstname]becomes the visitor's first name, for example "Call [Firstname] about their enquiry".
Share it
Open the Share tab.
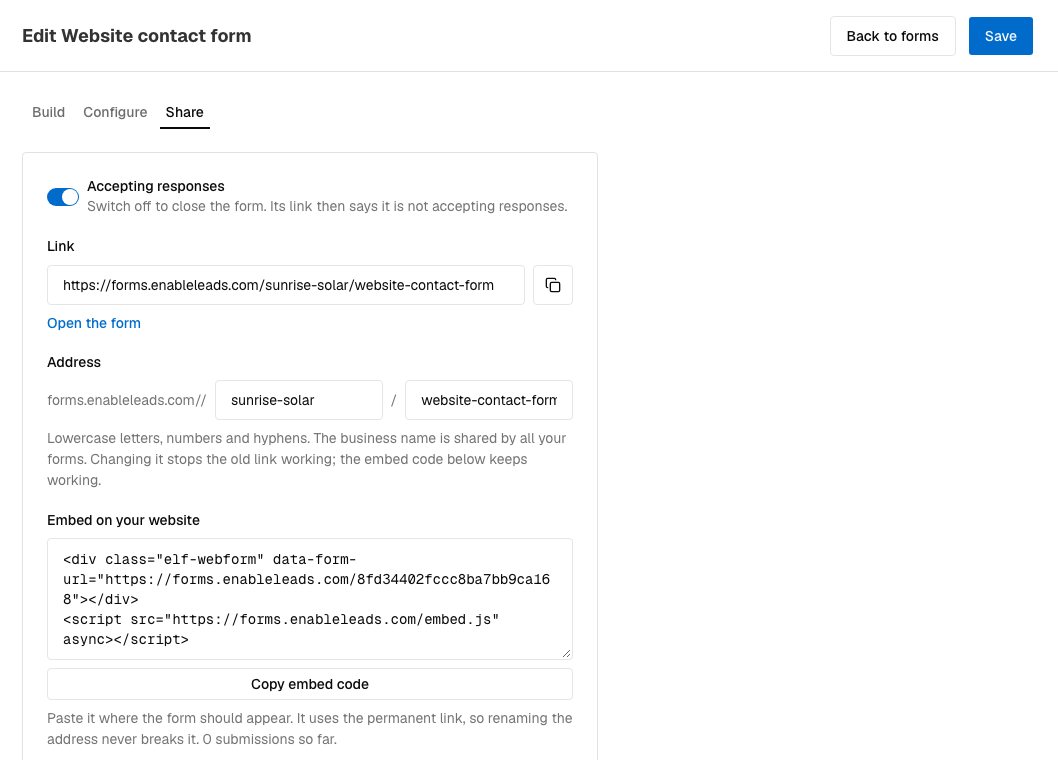
- Link: a readable address such as
forms.enableleads.com/your-business/contact. Copy it into WhatsApp, email, an ad or a QR code. Change the two name parts under Address; the old link then stops working. - Embed on your website: copy the embed code and paste it where the form should appear. It uses a permanent link, so renaming the address never breaks a form already on your site, and it sizes itself to the form.
- Accepting responses: switch this off to close the form. Its link then says it is not accepting responses.
Keep spam out
Forms have a hidden trap for simple bots, check every answer before anything is saved, and limit how many times one visitor can send in a minute. If you still get spam, switch on Protect with captcha on the Configure tab. Visitors then pass a quick Cloudflare check, usually invisible, before they can send. (If the switch is greyed out, the captcha has not been set up for your EnableLeads yet. Ask us.)
If it does not work
- The form says it is not accepting responses. The Accepting responses switch on the Share tab is off.
- I get no new contacts. Open the form's link in a private window and send a test. If it works there, check that the embed code was pasted whole, with both lines.
- The captcha does not appear. Make sure nothing on your website blocks Cloudflare, and reload the page. Visitors who block it cannot send.
- A lead arrived with no task. The First task box on the Configure tab was empty when the lead came in.
What to do next
Was this helpful?
Still stuck?
Ask us and tell us what you were trying to do. We will see the page you came from.
Ask us in EnableLeadsLast updated 2 November 2026